Welcome to Eat Well Every Day

Welcome to Eat Well Every Day!

I've spent years researching nutritional information, food ideas and recipes, because cooking and eating - especially with family & friends - are some of life's great pleasures. And guess what- healthy food doesn't have to be boring! It can be exciting and delicious!

Labels

vitamin C (11) antioxidants (9) calcium (8) garlic (8) winter (8) gluten-free (7) seasonal eating (7) protein (6) summer (6) cakes (5) iron (5) vegan (5) vegetarian (5) chocolate (4) cookies (4) flour (4) green vegetables (4) immune system (4) meat (4) pears (4) soups (4) vitamin A (4) B Vitamins (3) Mediterranean (3) almonds (3) beta-carotenes (3) casseroles (3) farmers' markets (3) fibre (3) fruits (3) ginger (3) lamb (3) lentils (3) limes (3) sustainability (3) Christmas (2) anaemia (2) apples (2) autumn (2) baking (2) beef (2) bones (2) broccoli (2) cancer (2) chickpea (2) cinnamon (2) dairy (2) feta (2) garbanzos (2) haemoglobin (2) mango (2) mushrooms (2) raspberries (2) stews (2) tomatoes (2) Australia Day (1) Indian cookery (1) Michael Pollan (1) Omega-3 (1) Omega-6 (1) amino acids (1) applesauce (1) beetroot (1) biscotti (1) biscuits (1) blood pressure (1) chicken (1) children (1) chilli (1) cloves (1) cocoa (1) coeliac disease (1) courgettes (1) dahl (1) diabetes (1) eggs (1) factory farming (1) figs (1) food combining (1) foraging (1) gardening (1) guerrilla gardeners (1) heritage vegetables (1) kidney beans (1) lactose-intolerant (1) leeks (1) lime juice (1) longevity (1) lycopene (1) marmalade (1) meatless meals (1) multi-coloured carrot (1) organic producers (1) parsley (1) prosciutto (1) pumpkin (1) red wine (1) rice (1) rye (1) salad (1) silverbeet (1) soy (1) spices (1) spinach (1) squash (1) street gardens (1) tainability (1) tapioca (1) teeth (1) tryptophan (1) whole foods (1) zucchini (1)

Friday, July 19, 2013


Comfort food

Yesterday was a grey, cool day, and I was feeling rather low thanks to my chronic illness, which flared up again recently. Mid-afternoon I found myself craving old-fashioned British style comfort food from my childhood. The craving was so strong I could almost smell and taste my grandmother’s wonderful treacle tart, which seemed to hover just the other side of my window glass.

Coming from British background, and with a Scottish grandmother who cooked most of our meals and was a dab hand at perfect light pastry, our food was solid, hearty meat and vegetable dishes, followed by the most delicious cakes and puddings, pies and tarts imaginable.

Shaking myself awake, I considered what comfort food I could have, given that I can’t have treacle tart, for a myriad of reasons connected with the dietary restrictions of my illness. Plus the fact  that a whole treacle tart is way too big for one person!

So I went browsing through my recipes, and knowing that I’d be finishing the last of the delicious garlic and rosemary roast lamb - a comfort food I wrote about before – I decided on basic baked egg custard, creamy but not bland, making good use of the oven, which could reheat the lamb and roast vegs under the custards.

Baked egg custard was staple pudding of my late 1950s childhood, and I learnt to cook it by the time I was 10. It’s high in calcium and protein, plus vitamins A, B, C and D, phosphorus and zinc from the eggs. When I had my children, it was a regular pudding, being nourishing and easy for small children to eat, while remaining delicious enough for adults to enjoy. It also went well with home-bottled or canned fruit. Of course that was a pudding for four of us, so in recent years I’ve adapted it to make two single servings.

Here’s my version of the classic Baked Egg Custard

For 4 people:

4 eggs
2 cups milk*
½ cup cream**
3 tablespoons sugar,
1 teaspoon vanilla essence***
nutmeg for sprinkling

Notes
*Any milk you prefer; I use soy, it’s a matter of taste, although almond or oat milk might be rather thin-tasting.
** If omitting cream, replace with another ½ cup milk
*** Since we didn’t have vanilla beans back then, I’m happy to keep using proper vanilla extract. If you prefer the pod/seed trick, infuse them in the slightly warmed milk for 10 minutes before adding to the beaten eggs and sugar.

Grease a 4-cup size dish and stand it in a larger baking dish. 
Beat together the eggs, sugar, cream and vanilla essence, until they are well beaten.  Warm the milk to blood heat, and pour into the egg mixture, whisking them all together.

Pour the custard mixture into your dish and top with ground or grated nutmeg. Fresh nutmeg smells divine as you’re grating it, and the ‘megs’ keep in an air-tight jar forever. Carefully pour cold water into the larger baking dish, to bring it halfway up the sides of the inner dish.

Bake in the middle of a 150C (300F) oven for about 40 minutes, or until just set. It’s easy to overcook – take the custard out while still a little wobbly, as it will firm up.  If your oven is fan-forced, set the temperature 20 degrees cooler. 
To make individual servings, divide the custard mixture between 4 1-cup ramekins, stand in cold water as before, and bake for 25-30 minutes until just set.

Boiled Chocolate Cake

Still on comfort food, here’s a rich, most, almost fudgey chocolate cake, still using the basic ingredients of the 1950s and early 1960s, before cake mixes and chocolate chips. It’s a tweaking of one put out decades ago by Cadbury cocoa. Like all my baking, this can be made with gluten-free flour.  Just take care when mixing the flour in, as it’s harder to mix through completely than wheat flour.

1 cup water
1 cup sugar, white or raw
¼ cup soft brown sugar
125 gm (4 oz/½ cup) butter
½ cup cocoa
½ teasp bicarb (baking soda)

1½ cups SR flour, or plain (all purpose) flour and 3 teasp baking powder.
2 eggs lightly beaten.

In a large saucepan, place the water, sugars, butter and cocoa. Heat this mixture gently, stirring until the butter and sugar have melted and the whole mixture comes together as a glossy dark brown liquid. Then bring to the boil and simmer for two minutes.  Take it off the heat and immediately stir in the bicarb (baking soda). The mixture will froth up, which is why you need a large saucepan to contain the volume. Leave to cool for 20-30 minutes.

 Meanwhile, heat the oven and grease a 20cm (8 inch) cake tin. Sift together the flour into a large bowl, beat the eggs.
When the cocoa mixture is cool, alternately stir in the sifted flour and eggs and mix together until blended, but do not beat.
Pour into your greased cake tin, and bake for 45-50 minutes, or until a skewer poked in the centre comes out clean.*
Leave cake to cool for 10 minutes in the tin, before turning out onto a cake rack.

* I bake this in a square Pyrex casserole, so I reduce the oven temperature by 10 degrees, to prevent the cake overcooking. It will also go on cooking in the Pyrex for a little  longer after it’s taken out of the oven.
  

Buon appetito!

Sunday, July 1, 2012

Feeling Chilly? Have Some Chilli


You know it’s cold when you can see your breath, and for sunny Sydney, that time has arrived! It’s well and truly winter, with mid-winter festivals and Christmas in July all over the city and up in the Blue Mountains. Time for some hot food, really hot!

When most people think hot, in food terms, chilli (chili) is what springs to mind. We’ve all seen tv docos or YouTube clips of people trying to eat the hottest chilli peppers, and suffering for their courage! Are they mad?

It’s much easier to enjoy chilli’s heat in a good dish of chilli beans or chilli beef, or in a more subtle form in a good red curry. The heat in chillis comes from a phytonutrient called capsaicin, also found in capsicums (bell peppers), which may have anti-inflammatory effects, and is being researched for possible effects on tumours. It’s also rumoured to help you burn fat faster. Whatever the truth of these claims, capsaicin certainly warms you from the inside!

Cayenne pepper also contains capsaicin, and is a great garnish sprinkled on soups, scrambled eggs, toasted cheese, or added to a stew for a hint of fire.

So, to the recipes

Vegetarian Chilli Beans
I couldn’t do a post on chilli without giving the recipe for the best chilli bean dish I’ve tried, thanks to a friend of a friend in the US. The addition of oregano, cumin, fennel and cayenne give it a Cajun flavour. Since it’s an American recipe, I’ll give the American terms first, followed by the Aussie/English ones. If you leave off the cheese or sour cream, this is a totally vegetarian/vegan dish.

1 medium yellow (brown) onion, chopped
1 medium yellow or red bell pepper (capsicum) , diced
3 cloves garlic, pressed, crushed or chopped finely
1 teasp paprika
1 tablesp chili powder, or dried chili, or 1 tablesp sambal oeleck paste
1/2 teasp dried thyme
1/2 teasp dried oregano
1/2 teasp fennel seeds
1 teasp ground cumin
generous pinch or sprinkle of cayenne pepper
1x 15 ounce (425 gram) can kidney beans, drained and rinsed
1x 15 ounce (425 gram) can diced tomatoes
Salt and black pepper to taste
olive oil for sautéing

Sauté the onion and capsicum gently in the oil until soft but not browned. Toss in the beans garlic, chilli and spices, sir to coat with oil. Toss in the tomatoes, bring to the boil, cover and simmer gently for 15-20 minutes.
Adjust seasonings to taste and serve on rice, (white or brown), polenta, noodles, a baked potato – whatever carbohydrates you favour. Garnish with chopped cilantro (coriander) or flat leaf parsley, and you could also add a handful of tasty cheese. A dollop of sour cream goes nicely too!
Serves 2


Spicy Brown Rice and Bean Soup
Chilli heats up this minestrone-style soup, and turmeric deepens the flavour while adding extra iron.


2x 425 gram (15 ounce) can kidney beans, or any other beans or chickpeas (garbanzos), drained and rinsed
1x 425 gram (15 ounce) can of tomatoes
6 tablesp partially cooked brown rice
1 large onion, chopped
1 large carrot, sliced or cubed
2 sticks of celery, chopped
1 large potato, peeled and cubed (optional)
2 cloves of garlic, chopped (more if you like)
2 tablesp chilli powder, or dried chilli, or 1 tablesp sambal oeleck paste
1 tablesp turmeric powder
salt & pepper to taste
oil for sautéeing
1.5 litres (about 6 cups) stock or water and stock cubes

Sautee the vegetables , apart from garlic, in the oil, until onions start to soften, add the half-cooked rice. Tip in the turmeric and chilli and stir to release aromas and to coat the rice and vegetables. Add the garlic and tomatoes.

Pour in the stock, bring to the boil and simmer for 10-15 minutes , until rice is cooked. Add the beans and simmer gently for another 10 minutes, or until the soup smells and tastes right. Garnish in the same way as the chilli pot, and serve with crusty bread or thin toast

Variation: you could replace the potato with cubed pumpkin (winter squash), which goes really well with turmeric and chickpeas.
Serves 4

Buon Appetito!

Friday, June 15, 2012

She'll Be Apples!


We don’t hear it said much now, but when I was a child, “she’ll be apples!” was a common comment. It means “everything will be fine; it’ll be OK”. My home state, Tasmania, was known as the Apple Isle, as we grew the best apples in Australia, and regularly exported them to Britain, Europe and Japan. No wonder I love apples so much!


Way back in January I promised you more apple recipes, and now the winter solstice is almost upon us, here are some warming apple recipes. For these you’ll need cooking apples – Grannie Smiths or whatever the equivalent is in your neck of the woods. I’ll start with the easiest – basic stewed apple, as stewed apples or applesauce form the basis for many cake recipes, as well as going really well with pork, bacon and vegetables like kale or cabbage.


Basic Stewed Apples

4 large cooking apples, peeled, cored and roughly sliced

Enough water to cover slices in a medium sized pan

2 tablesp sugar, or the equivalent in honey (to taste)

1 inch” piece of ginger, peeled and julienned (thin strips) (optional)

4-6 whole cloves (optional)

1 stick cinnamon broken roughly into pieces (optional)

Peel of half a lemon, cut roughly (optional)

Squeeze of lemon juice (optional)


A lot of these ingredients are optional, depending on what spiciness you want for your stewed apple. At it’s most basic, I put a few bits of lemon rind (pith & all) from a recently squeezed ½ lemon, in with the apple slices.

Pour in just enough water to cover apples, bring to the boil & turn down immediately to a very slow simmer. Don’t go far from the stove, stewed apple cooks very quickly! When the slices are soft enough to mash with a spoon or fork, remove from heat and take out all spices and lemon peel. Allow to cool slightly, then stir in sugar or honey. Adjust sweetness to taste, and add lemon juice for a better flavour.


To make applesauce, simply mash or puree your stewed apple.


Baked Apples

A winter treat from my childhood, these are almost as simple to make as stewed apple, and are perfect with cream, icecream, or as my Scottish grandmother used to serve them, with bright yellow custard made with custard powder.


4 large cooking apples (makes 4 serves, or 2 for 2 greedy people)

1/3 cup of chopped dates, sultanas or any dried fruit

2 tablesp brown sugar

½ teasp ground cloves or cinnamon (optional)

Butter

A shallow baking dish large enough to hold all four packed close together.


Thoroughly butter the dish for the apples. With an apple corer (a nifty gadget available from most kitchenware stores), carefully remove the core from each apple. Cut off a little from the base of each core to make a plug; fit the plug into the apple it came from for the best fit. Then with the point of a sharp knife, carefully score all round the equator of the apple. This stops the skin bursting as the apple cooks.


Stand the apples in the baking dish. In a small bowl, mix together the sugar, spices, and dried fruit. Spoon carefully into the apple hollows. Top with a small knob of butter. Pour about an inch (2.5cm) of hot water around the apples. Cover dish with a sheet of baking paper or foil


Bake in preheated oven (180C/350F) for 15-20 minutes. Remove cover and bake another 10-15 minutes until the apples are soft. Don’t worry of some of the filling runs out the apples; the hot water makes a light syrup with the sugar, butter etc.


Note: If you have something else cooking in your oven, such as a roast or a casserole, put the apples on a lower shelf and cook for a while longer.


Apple & Sultana Loaf


An old-fashioned ‘teacake’, Apple & Sultana Loaf is perfect for afternoon tea, toasted or warmed and spread with butter and accompanied by a pot of your favourite tea. It’s also a good standby for packed lunches or between meal snacks. This loaf can be made in two ways – with diced raw apple or with stewed apple/applesauce.


1½ cups self-raising flour or plain (all purpose) flour & baking powder to make SR

1 cup sugar

1 teasp ground cinnamon

½ teasp ground cloves

2 eggs, lightly beaten

125 gm (4 ounces) butter, melted

2 large cooking apples, peeled, cored & diced

I cup of sultanas.

About a tablesp of milk or water, if needed


Sift the dry ingredients into a large bowl, toss in the apple cubes and sultanas, and stir to coat fruit with flour. Add the cooled melted butter to the beaten eggs, then stir this liquid into the dry ingredients. Add the extra liquid if the mixture is too stiff. Do not overbeat, just mix well.


Spoon into a greased and lined loaf pan (23x13.5x7xcm; 9x5½ x2 3/4 inches) and smooth the top. Bake at 180C (350F) for 40-45 minutes, or until skewer comes out clean. Leave to cool for at least 10 minutes before removing from pan. Leave to cool completely before cutting. Sadly,fluten-free flour will not rise as beautifully as wheat flour!


Note: You could try using eating apples instead of cooking ones for the raw apple version, but they don't always cook as well.


Variation: replace raw apple with 1 cup unsweetened stewed apple (or reduce your sugar) . Mix the melted butter and the beaten eggs into the stewed apple, then proceed as before. This variation may take a little longer to cook.


Buon Appetito!

Saturday, April 21, 2012

Goodbye Summer, Hello Autumn!


Now that the debilitating migraine-inducing humid summer weather is (hopefully) finally gone, and autumn has officially started with end of Daylight Saving, I can enjoy sharing some more food and nutrition ideas with you. I promised more apple recipes in my last post, but not today. Today, in salute to the end of summer, I give an easily adapted leek frittata, and pear and raspberry bread.

Leeks are available all year round, but psychologically, feel more like an autumn food to me. Others may disagree, but it's when the heat and humidity start to ebb that I remember the pleasures of leeks. Related to garlic and onions, leeks offer all the health benefits of garlic, including antioxidants and antibiotic properties, but are milder and sweeter in flavour. Leeks were favoured by the Egyptians when they were building pyramids, and the Welsh have a leek as their national symbol. Perhaps it's the Welsh in me from my grandfather that makes me love the leek!

Pear and raspberry bread has become very popular on the Sydney cafe scene, so I determined to make some myself. I don't claim this recipe as an original so much as an amalgam of the various recipes I found on the web. Mine uses frozen raspberries, as fresh ones have such a short season and are ridiculously expensive, unless you live in a raspberry growing area, or have raspberry bushes in your garden. Frozen raspberries are not as delicious as fresh picked ones still warm from the sun, but they are an adequate substitute that you can have year round. Raspberries have good levels of Vitamin C, even the frozen ones. My only gripe with the frozen ones is they go purple when baked!,

So, to the recipes:

Leek Frittata
The name 'frittata' is a bit of a misnomer, as I actually bake it in a 26x16x5cm (10x61/4x2inch) pyrex lasagne dish. It's an adaptation of a frittata recipe from the early 90s; I gave up trying to fry it, as I always made a mess! The beauty of this recipe is you can substitute the cheese with whatever you have in the fridge or feel like eating - extra tasty cheddar, Swiss, fetta, whatever takes your fancy. Ditto with the zucchinis. I often swap them with celery, a flavour that goes well with leeks. You can also substitute the herbs. I like dill, but try oregano, marjoram or tarragon. Be adventurous!

• A good slurp of olive oil
• 3 small leeks or 2 large ones, thinly sliced
• 2 medium zucchinis (courgettes), julienned (matchsticks)
• at least 1 clove of garlic , chopped fine
• 5 eggs lightly beaten
 • 11/2 cups milk, or milk and yoghurt blend
 • 4 tablesp freshly grated Parmesan cheese (NOT the packaged powdered stuff!)
 • 4 tablesp of another cheese, cubed (cubes can be as large or small as you like)
 • 2 tablesp plain (all purpose) flour with a good pinch of baking powder
 • salt and pepper to taste (white pepper is better than black in this pale dish)
• 2 teasp dried dill

Sauté the leeks in the oil, until starting to soften, cover and cook on low for 10 minutes. Add your garlic and julienned zucchini, stir, and cook covered for another 10 minutes. If substituting celery for the zucchini, sautée it with the leeks, and make sure all vegetables are very soft before you do the next step.

Tip into a large bowl and leave to cool. When cool, mix in the cheeses and herbs.
In a large bowl or glass jug, mix the flour carefully with a little of the milk to make a smooth paste. Stir in the beaten eggs. Add the rest of the milk and the seasonings, stirring well to eliminate any lumps.

Spread the cheesy vegetable mix over the base of your oiled dish, pour in the milkand eggs, and stir gently until well combined.

Bake in the middle of a 180C (350F) oven for 25-30 minutes. at the 25 minute mark, test with a skewer to see how close to cooked it is. It should be slightly runny in the middle. If so, turn the oven off for the last 5 minutes to avoid overcooking.

Leave to cool completely before you attempt to cut it; this allows it to firm up.

Sue's Gluten-free Café-style Pear & Raspberry Bread
This is yummy toasted and spread with butter or smooth ricotta, and makes a great breakfast loaf. (Toast under a griller, not in a pop-up toaster - it will stick and burn.)

• 4 medium cooking pears, peeled, cored and grated or chopped fine.
 • 1 tablesp lemon juice
• 3 cups plain (all-purpose) flour
 • 1 teasp bicarb (baking soda) and 1/2 teasp baking powder
 • 3/4 cup melted butter
 • 3 eggs
 • 2 teasp vanilla essence
 • 2 tablesp milk
 • 1/2 cup frozen raspberries (or fresh, if you can)
 • 3/4 cup sugar, preferably brown, but raw or white are good

Grate or chop pears and toss in the lemon juice to prevent them browning. make sure all the juice from the pears goes in the bowl.

Sift together the dry ingredients. Whisk together the eggs, milk and vanilla, add the melted butter and whisk until blended.

Pour the liquid into the dry ingredients, add the pears and mix until combined, but do not overmix. Fold in the raspberries.

Pour batter into a greased and lined large loaf pan and smooth the top. Bake in 180C (350F) oven for an hour, checking with a skewer at the 55 minute mark. You might need to reduce the temperature a few degrees if the top is browned but the inside is not yet cooked.

Leave cake in its pan for at least 15 minutes to cool and firm before removing it. Place on a rack to cool completely before cutting.
Buon Appetito!

Friday, January 27, 2012

The Aussie Apple for Australia Day


Musing on Australia Day about what is the typical Aussie fruit I thought bananas – no; mangoes – no; pineapples – no; Granny Smith apples – yes! The Granny Smith is the apple Australia gave the world. It’s great for cooking with, ultra-reliable, and it’s also crisp, crunchy and slightly tart – perfect to bite into on a hot summer day.

Apples are not seasonal in high summer, but with controlled atmosphere storage, (cool storage), we can have crisp, juicy apples pretty much all year round. And with the new, smaller, varieties of what my family call “Granny Miffs,” (a N-W coast Tasmanian pronunciation), you can have big ones for cooking and small ones for munching.

As a proud Tasmanian, I always understood the Granny Smith originated in the apple-growing areas of the Huon Valley, a self-seeded tree, mutated from apples tossed out by early settlers or explorers, (maybe even Bass & Flinders during their circumnavigation of the island), and discovered by a local woman, the eponymous ‘Granny Smith’, some time in the 1830s or 40s, long before her NSW namesake claimed the triumph. Alas, I can find no documentary evidence to back up this lovely legend! You can read about the ‘real’ Granny Smith here.

An apple a day keeps the doctor away

Granny Smith’s great-granddaughter Edna Spurway certainly thought so. She lived to 101, and was quoted in the Sydney Morning Herald as attributing her longevity to “good genes and lots of apples”.

What we now know is some of the reasons why a daily apple is so good for our health. Some 85 different studies have found that apples’ high levels of powerful antioxidants help protect the eater against cell-damaging free radicals, which could contribute to various cancers, cardiovascular disease, T2 diabetes and even asthma.

It’s amazing, but one standard apple contains more antioxidant power than one orange, half a punnet of blueberries or a cup of strawberries. Apples also contain useful amounts of calcium, potassium, iron and zinc, and on top of all that, they’re low GI. Plus, it’s much easier to walk out the door biting into a crisp juicy apple, with the juice spurting down your chin, than to eat the equivalent amount of strawberries or blueberries on the run. Even an orange has to be peeled!

Granny Smith – the world’s favourite cooking apple

I’m not sure if that’s 100 per cent correct; there maybe some regional apple varieties in other parts of the world that cooks swear by, but in Australia it’s certainly true. So, to the recipes:

Granny’s Apple Crumble

No, not Granny Smith’s, but my version of how I think my Scottish grandmother made apple crumble. She was an excellent cook, but she never shared her recipes, so when I came to make apple crumble for my young family after she'd died, I had to recreate it from taste memory, (with a little help from the English Women’s Weekly on rubbing the butter into the flour).

4 large green cooking apples
3 or 4 cloves, or ¼ teasp ground cloves
½ - 1 teasp ground cinnamon
About ½ cup of water.

Thinly slice the peeled and cored apples, place in a large saucepan with the spices and cover with the water. Be sparing with the water, you don't want the apples to become too sloppy. Stew gently until they are only just cooked. Stir in just enough sugar to taste – not too sweet. Put stewed fruit into a large oven-proof dish or lasagna dish.

Topping:
125 grams (4 oz) butter or margarine
½ cup of soft brown sugar
1 cup of plain (all purpose) flour
1 cup of instant rolled oats (quick cooking or microwaveable oats)

In a large bowl put the flour and the butter, cut into tiny cubes. Rub the butter into the flour using your finger-tips, until the mixture is like small breadcrumbs. This is messy work, but quite fun, and the rubbing action aerates the mixture. (Don’t use a food processor unless you’re absolutely pushed for time!) Stir in the brown sugar and the rolled oats, keeping the mixture as light as you can.

Spread the topping over the stewed apple; try to use a dish that enables you to have quite a thick crumble topping. Bake at 190C (375F) for 25-30 minutes, until crumble is golden brown. Serve warm or cold with cream, yoghurt or icecream.
Serves 4

Options: You can vary the crumble topping by replacing the oats or about 1/3 of the flour with coconut or any crunchy breakfast cereal. Using gluten-free flour and removing the oats makes it safe for coeliacs and people with gluten-intolerance. You could also replace the apple with any other stewed fruit or even tinned (canned) fruit or frozen berries, but then it wouldn’t be a traditional apple crumble! But still delicious.


More apple recipes to come!

Buon Appetito!

Monday, January 9, 2012

Less Nutritionism, More Enjoyment

Rereading In Defense of Food, Michael Pollan’s analysis of the ‘Western Diet’ and food science and technology, I’ve realised, to my dismay, that I’ve been toeing the ‘nutritionism’ line in these blogs. That is, putting more emphasis on the importance of the individual macro- and micro-nutrients in each food, rather than celebrating the whole food for its wonderful qualities of taste, colour, ripeness, seasonal variety, and sheer enjoyment.

I apologise! As a health and science journalist, I have to admit I do like to know what individual food items contain, and their possible health effects on the human body. It pleases me to know that broccoli contains sulforaphane which switches on a set of antioxidant genes and enzymes in specific immune cells, which then combat the injurious effects of free radicals that can damage cells and lead to disease. (Broccoli Boosts Immunity.)

But that doesn’t tell you that cooked properly: lightly steamed and tossed with a little olive oil or melted butter, broccoli is “surprisingly delicious”, to quote a friend, or that picked at the peak of freshness when it will contain the maximum of its good nutrients, it’s a dazzling emerald green.

Similarly, I have written articles on the health benefits of following the so-called Mediterranean Diet. I've identified the individual nutrients in each of the food groups in the Mediterranean Diet, and their effect on our health. But did I mention how well all these foods go together? How the olive oil makes vegetables glisten and improves their flavour (as well as making them more digestible)? Did I say how beautiful the colours are, and the tempting aromas? I hope at least, that the photo I chose to go with the words gave you some idea of the sensuality of the food.

The Whole is Greater than its Components

I’m grateful to Pollan for reminding me that we humans don’t eat nutrients, we eat food. It’s a basic fact that we all know, but, sadly, an emphasis on ‘healthy eating’ and ‘healthy diets’, can all too easily lead to an emphasis on individual nutrients (nutritionism), and that can lead to relying on food supplements and packaged foods that carry health claims, rather than on real food that needs to be prepared and enjoyed. Real food that can be picked from your garden, or bought at a greengrocers, old-fashioned butcher or farmers’ market.

The Joy of Food

So, a New Year’s resolution for this blog. It’s called 'Eat Well Every Day', and I did mean well, both in the sense of ‘good health’ and in the sense of enjoyably and not expensively. So there will be more emphasis on the pleasure of the food I choose to discuss with you, as well as telling you what I know about the health benefits of each food. I made some good approaches in that direction back when I posted about my love of mangoes.

So, to the recipe:

It’s summer here in Sydney (at least some days), and figs, raspberries, mangoes, are all around, perfuming the air, and being utterly delicious just to eat fresh. Well, everyone knows how to eat fresh fruit, so here’s a recipe I have my daughter-outlaw to thank for. She made a huge dish of figs wrapped in prosciutto as part of our Christmas Day feast – figs gathered from the tree outside her front door. They were great on the day, and just as delicious (and messy to eat) for breakfast on Boxing Day.

Figs in Prosciutto

I’m not claiming this as an original recipe; it’s just one of many, many versions of this traditional Italian dish. Some versions stuff the figs with Gorgonzola, blue cheese, or brie, but I prefer to enjoy the perfect combination of roasted figs and slightly crisped prosciutto.

Large ripe figs, enough for each person to have at least two
An equal number of slices of prosciutto
Good olive oil
Small amount of real Balsamic vinegar
A baking dish large enough to hold the figs in a single layer.

Wrap each fig in a slice of prosciutto. You might need to hold them together with toothpicks. Stand the figs up in the baking dish. Drizzle a little good quality Balsamic vinegar over them, then brush each prosciutto slice with olive oil.

Bake at a little over 200C (400F) for 15-20 minutes, until prosciutto has melted a little and crisped, and the figs are cooked. These are just as delicious at room temperature as eaten warm.

Buon appetito

Saturday, December 17, 2011

More Gluten-free Festive Baking

I finally got my act together and made two batches of Burnt Butter Crisps, complete with the chocolate dollop on top. Here they are:


A colleague was talking about gluten-free biscotti, and I remembered I had a recipe for Christmas almond bread, which really is biscotti with an English name. Here’s the recipe:

Christmas Almond Bread

Like the Piparkakut, this needs forward planning, as the bread rests for a week before the final baking It may be too late for Christmas Day, but you can have it ready for Boxing Day, as something not sweet or chocolaty. Or as a New Year’s Eve nibble to go with the bubbly.

4 egg whites
125 grams (4 oz) caster sugar (superfine white sugar)
125 grams (4 oz) plain (all-purpose) flour, sifted
125 grams (4 oz) whole blanched almonds

Beat the egg whites until stiff, stir in the sugar, and beat well, like making meringue. Fold in the flour and the almonds.

Bake in a greased and lined loaf tin at 180C (350F), for 30 minutes, or until a skewer poked in the centre comes out clean. Turn out onto a cooling rack, and when completely cold, wrap in a clean tea towel or foil and store in the pantry for a week.

With a very sharp knife, slice the loaf as thinly as you can. Cut each slice into fingers. Spread on a baking tray and toast in a low oven (66C, 150F) for about 20 minutes until pale golden and crisp. Store in an airtight tin. These keep for a long time, unless all eaten over the holiday weekend!

Have a wonderful festive season! More good food ahead in 2012.

Saturday, December 10, 2011

Gluten-free Christmas Goodies


I was all fired up for a session of baking Christmas biscuits – not cookies, because these spicy delights are crisp and slightly chewy, not soft and cakey. But I ran into a problem, or rather two:

1: I couldn’t decide between making the Finnish ginger snaps (Piparkakut), which recipe I pulled from someone else’s cooking blog a few years ago, or my daughter’s variation on burnt butter crisps.
2: I didn’t have all the ingredients needed for the Piparkakut, nor enough gluten-free flour and sugar for both. Drat!

So, instead, I’ll give you the recipes for both, and after I’ve been to the supermarket and bought supplies, I’ll post a photo of whichever Christmas biscuit I decide to bake. They are very easy to make, and both recipes work well with gluten-free flour.

These spicy biscuits are perfect as little gifts, or just another sweet nibbly on the Christmas table. I’m not sure if they’re suitable for Hannukah, but if they are, that’s great. They’re also lovely at other festive occasions, or just for when you want something sweet and spicy.

V’s Burnt Butter Crisps

½ cup (100 gram) unsalted butter
1 cup castor sugar
1 vanilla bean, seeds scraped into sugar, or 1 teasp vanilla essence
1 egg, lightly beaten
1 cup plain (all purpose) flour
¼ teasp cinnamon
½ teasp cardamom
½ teasp nutmeg (optional)
2 or 3 grinds fresh black pepper
pinch of salt

I’ve been calling these ‘burnt’ butter crisps, but actually, the trick is to brown the butter without burning it. Put the butter in a small, heavy saucepan, let it melt and continue to cook, watching the whole time, until it browns. Leave to cool slightly.

In a large bowl put the sugar and vanilla. In another, sift the flour and spices together. Pour the browned butter over the sugar and mix well, then stir in the egg. Add the sifted flour and spices, and mix until blended thoroughly.

Drop by teaspoonfuls on biscuit trays (cookie sheets) lined with baking paper. Put them about 2 inches apart to allow room to spread. Bake at 180C (350F) for about 12 minutes, or until edges are turning golden and the tops have begun to crinkle. Let cool on the trays for a few seconds, then remove and cool completely.

You can serve them plain like this, or go for the chocolate option. Alternatively, make one batch plain, one batch chocolate-topped and offer them together.

The Chocolate OptionMelt a handful of good dark, semisweet chocolate chips in a double boiler, or a heavy based saucepan over another pan of boiling water. Take off heat, stir in an extra ¼ handful of chocolate chips, stirring until they melt. Drop a dollop of chocolate on top of each biscuit and allow to set.

Finnish Ginger Snaps (Piparkakut)

These take a bit of planning ahead, as the dough has to rest in the fridge or somewhere cool for at least 12 hours (and up to 2 days) before baking.

125 gram (4 oz) golden syrup or light molasses
2 teasp cinnamon
2 teasp ground ginger
1 teasp ground cloves
Rind of 1 orange, finely chopped
150 gram (5 oz) salted butter
150 gram (5 oz) sugar
1 egg
1 teasp bicarbonate of soda (baking soda)
500g (1lb, 2 cups) plain (all purpose) flour


Cream the butter and sugar together in a large bowl, then beat in the egg.

In a small pan, combine the syrup and spices and bring to the boil. Allow to cool slightly, then add to the butter/sugar/egg mixture and stir well.

Sift the flour and bicarb in to mixture and mix into a dough. Cover and leave in the fridge for at least 12 hours.

Pre-heat the oven to very hot –250C (480F). Divide the dough into quarters and roll out very thinly (approx. 2mm or ¾inch). Cut with a biscuit (cookie) cutter into rounds, or stars, trees and other Christmas shapes, and place on a baking tray. Bake for 5-6 minutes until golden brown. Leave on tray for 5-10 minutes to cool before moving them to a cooling rack.

Nutritional value

These festive biscuits are not super healthy or brilliantly nutritious. There may well be microtherapeutic benefits from the spices. But they don’t claim to be super foods. Just cheery, spicy, seasonal treats from the Northern European midwinter to this year’s chilly Australian summer.

Buon appetito!

Sunday, August 21, 2011

Gluten-free Baking

I had a query from a follower of Eat Well Every day, who said wistfully that she loved the sound of the ginger and almond cookies, but was afraid to make them as she has been advised to eat gluten-free, and wasn’t confident about substituting.

I know exactly her problem! I’ve been trying to eat gluten-free for some years, and have had to take it seriously in the past 12 months, once we discovered I have one gene for coeliac disease, and therefore can’t tolerate gluten. To compound the problem, as part of my diet to keep me strong and healthy while suffering ITP, I’m also on a lowish-carb diet and avoiding all grains (as much as possible).


So I can reassure this person – and anyone else with a gluten-tolerance problem – that every cake and cookie, quiche or slice I put up on this blog has been made gluten-free.


Gluten-free pear and almond loaf


Is it hard to substitute when cooking gluten-free?

The honest answer is yes – at first. I was fortunate in having a good friend who is both a nutritionist and married to someone with coeliac disease, so she was very experienced in cooking gluten-free. She passed on some basic cookie and cake recipes, which I still use. From them, I got the basics of substitution.

The main problem is that gluten-free flour does not respond in the same way as wheat flour. It has much less body without the gluten, and often doesn’t rise as well, take up the same amount of liquid as wheat flour, or cook in the same time. Some flours, like rice flour and corn flour (corn starch) are very light. Soy flour, on the other hand, is quite heavy, and has a strange smell, which fortunately disappears in cooking. Soy flour and besan flour (chickpea flour), another heavy one, are best combined with lighter flours.

So you experiment. Be prepared for failures, or more likely, not quite perfects. Once you get the hang of it and find a flour or combination of flours you like, gluten-free cooking is just as much fun and the results as delicious as cooking with wheat flour. (I say wheat, because that’s mainly what flour is, but if you’re avoiding gluten, don’t forget to by-pass rye and oats. No more rolled oats, but brown rice flakes make a perfect substitute.)

Commercial gluten-free flours

Commercial gluten-free flour mixes, while more expensive than wheat flour, are fairly easy to find at your supermarket or health food store. Before I had to avoid grains, I found a commercial mix of rice flour, soyflour and tapioca quite good, although it was rather lumpy and needed sifting two or three times.

Now I use Orgran all-purpose flour, which is made from maize starch (corn flour), tapioca flour, rice flour and guar gum. It’s a lighter mix, and the ratio of rice flour to other ingredients is lower. I don’t usually endorse commercial products, but I’ve found this mix very easy to use, with consistently good results.

For some recipes, such as the pear and almond cake, and the next recipe, I add a bit of extra body by substituting with a couple of tablespoons of besan flour.

So, to the recipe: Beetroot Chocolate Brownies

This is my take on Hugh Fearnley-Wittingstall's Chocolate and Beetroot Brownies. I was quite taken by his idea of treating beetroot as a fruit, and copied the recipe a couple of years ago, before I got serious about baking gluten-free. Now I've modified it to omit the wheat flour.

250g (10oz) dark chocolate (preferably 70% cocoa solids), broken into pieces, or dark chocolate chips
250g (10oz) unsalted butter, cut into cubes, plus more for greasing
250g (10oz) caster sugar
3 free-range eggs
150g gluten-free flour (1½ cups), plus 2 tablespoons of besan flour
baking powder (baking soda) to make flour mix rise
250g of beetroot, boiled until tender, peeled and grated or chopped very fine
A 20x30x3cm (8x12x1 inch) baking tray (known in Australia as a Swiss roll or lamington tray)

Turn the oven on to 180C (350F). Put the chocolate and butter in a heatproof bowl or jug, and put on a lower shelf in the oven to melt. When partly melted, stir, and put back for a few more minutes to melt completely.

Meanwhile, beat the eggs and sugar together, and in a separate bowl, sift the flours and baking powder together. Cut or grate your cooked beetroot.*

When the butter and chocolate are melted, mix them, a little at a time into the egg and sugar mixture. Then fold in the sifted flour very gently, and lastly, the beetroot. Do not beat, just mix together gently.

Pour mixture into a greased and lined tray, smooth the top, and bake in the top of the preheated oven until just cooked. According to H F-W “a knife or skewer pushed into the middle should come out with a few moist crumbs clinging to it. Don't be tempted to overcook them!”

He says 20 minutes should be long enough. However, whether because of the g-f flour, the fairly large eggs, or a slightly lower oven temperature, my brownies took 30 minutes. Test every few minutes after the 20 minute bell.

Leave to cool in the tray before cutting into squares. Makes 24.

*To cook beetroot: Scrub gently under cold water, but do not cut roots off or peel the vegetables. Put in a large pot with plenty of water, cover, bring to the boil, then simmer for 30 minutes, or until tender. Allow to cool slightly, then, protecting your hands with rubber gloves, slip the peel off and remove the roots.

Buon appetito!

Tuesday, August 16, 2011

Almonds and Pears

“Almonds and pears” – sounds like something out of an old nursery rhyme, or maybe some Cockney rhyming slang. But it isn’t either of those, it’s two ingredients that are cheap, plentiful and healthy, which combine together beautifully in many recipes, especially cakes and cookies.

I’ve told you about pears – ‘the gift of the gods’ and why pears are counted in the top 100 healthiest foods.

But what about almonds? The humble ‘nut’ (botanically, it’s a ‘drupe’ not a nut, but who’s counting?) of a tree related to peaches and apricots, with the most glorious blossom in early spring, the almond has been revered for thousands of years as a symbol of fertility and happiness. When you see the white froth of almond blossom, you know spring is just around the corner.

Believed to have originated in the North of Africa and western Asia, almonds are now grown in many countries with a Mediterranean climate, including Australia. Australia is the world’s third-largest producer of almonds, after California and Spain. No wonder we can always get fresh almonds relatively cheaply!

Almonds can be bought as plain raw nuts, roasted, blanched, blanched and slivered or flaked, or as almond meal. Because the Omega-3 and Omega-6 content can be damaged by high heat, it’s preferable to dry roast the nuts yourself, instead of buying commercially roasted almonds. Put them in a single layer on a baking tray and roast for about 20 minutes in a low oven (no higher than 100C or 212F).

Almonds’ high nutritional value

Because of their subtle flavour, almonds can combine with almost any other food But it’s not their versatility that includes them in the ‘healthiest foods’ – these nuts are actually given ‘qualified health claim’ status by the United States’ Food & Drug Administration in recognition of the health benefits of eating almonds every day.

For such a small item, an almond packs a mighty nutritional punch. As well as their high protein content, almonds have monounsaturated fat, Omega-3 and Omega-6 fatty acids, fibre, and as much calcium as cow’s milk, along with good amounts of Vitamins A, C, E and D, all the B vitamins, folate and Vitamin K. Then there's the minerals: copper, iron, magnesium, manganese, phosphorus, potassium and zinc.

So, to the recipes: Pear and Almond Cake

Almonds combine beautifully with pears in this cake, which can double as dessert, warmed slightly and served with cream, icecream or yoghurt. Or you can toast slices and spread with soft butter.

2 cups sugar
3 cups pears, peeled and diced,
2 cups plain (all purpose) flour and baking powder to raise,
1 teasp bicarb (baking soda)
1 teasp salt
2 teasp cinnamon
3 eggs, beaten
1 cup oil or melted butter
2 teasp vanilla essence
1 cup slivered almonds

Mix together the pear pieces and sugar and leave for 20 minutes or so to develop juices.

Sift together the flour, salt, cinnamon and raising agents, then add rest of the ingredients and stir well. Bake in a greased large square tin or a Bundt pan at 180C (350 F) for 1 hour.

Ginger and Almond Cookies

Remember to make the dough well ahead of when you want these cookies, as it has to sit in the fridge for several hours to firm up before baking.

¾ cup (190 g/6 ounces) of softened butter
1 cup packed, soft brown sugar
2 tablesp light molasses, honey or Golden Syrup
1 egg
1½ teasp baking powder
½ teasp salt
1 teasp fresh ginger, grated finely, or at least 1 teasp ground ginger (more if you prefer)
1¼ cup plain (all purpose) flour
1 cup ground almonds (almond meal)
48 blanched whole almonds (cheaper to blanch your own.)

In a large bowl, cream the butter and brown sugar until light and fluffy. Beat in molasses/honey/Golden Syrup, the egg and ginger. Sift together the flour, baking powder and salt, then mix into sugar and butter mixture until you have a soft dough.

Form the dough into two logs, wrap in plastic wrap and refrigerate several hours or overnight. Meanwhile, blanch your almonds, if you haven’t bought ready blanched ones. Put them in a heatproof bowl, pour hot, (not quite boiling) water over them and leave to cool, when you can slip the skins off.

Cut the dough in slices and shape these into walnut sized balls. Put about 2" apart on a greased cookie sheet, and press a blanched almond into centre of each ball, flattening them slightly. Bake for 10 to 15 minutes in a 175C (350F) oven until lightly browned on bottom.

Makes about 4 dozen.

Buon Appetito!

Thursday, August 4, 2011

More Hearty Winter Casseroles – Goulash

This is another of my old favourites from the 1970s. Cooked slowly in the oven for three or four hours, it transforms stewing steak or gravy beef into a savoury, slightly spicy – and in the 70s, distinctly exotic – dish redolent of paprika, tomatoes and caraway seeds. There's a potato topping to this casserole, or you can add dumplings instead to make a really filling dish

A Hungarian friend has since told me this is not an authentic goulash, so I haven’t called it Hungarian Goulash, as the 70s recipe did!

500 gm (1lb) stewing steak, cut into 4cm (1½ inch) cubes
500 gm (1lb) potatoes, sliced thinly
400 gm (12 oz) canned tomatoes & their juice
2 large onions, chopped
2 cloves garlic, minced or smashed
slurp of oil for sautéing
1 tablesp paprika, sweet or hot, (or a mixture, depending how hot you want the goulash)
1 tablesp marjoram (or oregano if no marjoram)
1 tablesp caraway seeds
1 teasp sugar
Hot stock, about 2 cups – you may not need all of this

Heat the oil in a large frying pan and sauté the onions and garlic until the onions are soft but not browned. Remove to the casserole. Turn up the heat and brown the beef cubes briskly all over. Sprinkle with the herbs and spices and add to the casserole.

Pour the tinned tomatoes and their juices into the frying pan and stir briskly to pick up any bits of meat or onion left behind. Add sugar to balance the tomatoes’ acidity, and pour into the casserole. Stir the mixture together. Add the hot stock, gently, a little at a time, until the meat is just covered with liquid.

Cover the casserole and cook at 160C (325F) for an hour and a half. Lower the temperature to 150C (300F) and cook for another hour and a half. While the casserole is cooking, make the dumplings, which you will add before the last 30 minutes of cooking.

If you’re not doing dumplings, layer the potato slices carefully over the top of the meat, pouring a little more hot stock over them to moisten them. Leave the lid off the dish and cook for the last 30 minutes or until the potatoes are soft and slightly crispy.

For the dumplings:
60 gm (2 ounces) self-raising flour or plain (all-purpose) flour and ½ teasp baking powder
a 250 gm packet of suet mix
Water, about ¼ cup to mix

Mix ingredients to a stiff dough. Divide into 8 and roll into small balls. Add these to the casserole when there is still 30 minutes of cooking to go, burying them in the stock. You may need to add a little more stock if the dumplings aren’t covered.

Serve with steamed and buttered carrots and cabbage. Serves 4.

Buon Appetito!

Tuesday, August 2, 2011

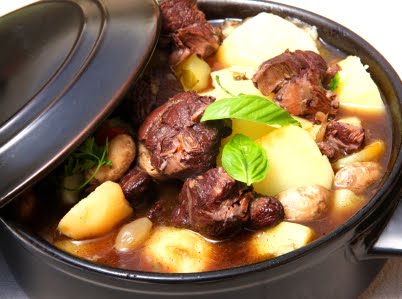
Hearty Winter Casseroles - Boeuf Bourgignon

August has just begun and at last we’re on the downhill run to Spring. But it is still winter, and August is the month when the old saying “as the days grow longer, the cold grows stronger” holds true. So, despite sunny days in Sydney that can reach 21C at midday, there are still chilly nights and gloomy grey days, (especially in Melbourne and Tasmania), and that means warming winter stews.

Stews and casseroles are interchangeable terms. Technically, a casserole is cooked in a casserole dish in the oven, while a stew simmers gently on the top of the stove. But really, they are interchangeable, the main point to remember is to cook slowly and gently. You can use a crockpot or slow cooker, a casserole or a stewpot, but DO NOT use a pressure cooker! Pressure cooking a stew results in tough meat and bland flavours and is a waste of good ingredients.

In an earlier post I wrote in praise of meat as a treat, not as something to be had every day. In that post, I talked about lamb – my favourite meat, and one of the world’s 100 healthiest foods.

So this time I’m focusing on beef – actually stewing steak and gravy beef, (sorry, I don’t know the equivalent US term). Australia is fortunate to have high quality meat that is relatively inexpensive, and stewing steak and the slightly fattier gravy beef are budget pleasing cuts. They are cheap, incredibly nourishing, and respond best to slow, gentle cooking, melting into tenderness and creating rich flavours with the other ingredients.

What’s so good about beef?

• High quality protein with all the essential amino acids in one package in relatively large amounts. One hundred grams of beef contains approximately 33 grams of protein.
• Iron, specifically haem iron, the easiest one to absorb. Iron is so essential for avoiding anaemia, and for enabling the blood's red cells to carry oxygen around the body. That 100 grams provides a hefty three to four milligrams of iron.
• Vitamins B1, B2, B6 and B12, zinc, selenium and phosphorus – good amounts of these essential vitamins and minerals.
• Tryptophan, the “feel good” food element. Tryptophan is an amino acid that works as a precursor to serotonin, the neurotransmitter that regulates sleep, appetite and mood. Foods rich in tryptophan are said to be “good mood foods”. Beef has tryptophan in spades – 100 grams contains about 0.33 grams.

So to the recipe: Boeuf Bourgignon

This is not the upmarket version that Guillaume Brahimi prepares, but a more budget conscious, down-to-earth casserole that’s probably nearer the French peasant original. As the name suggests, the meat was originally cooked in Burgundy. Since appellation contrôlée, we can no longer buy Burgundy in Australia, so choose a hearty red wine such as a cabernet-merlot or cabernet shiraz blend. Even a good cask wine will serve the purpose.

1kg (2 lb) stewing steak cut into 4cm (1½ inch) cubes
125 gm (4 oz) streaky bacon, cut into strips
1 carrot, sliced
1 onion, chopped
1 (or more) garlic clove smashed or chopped
1 teasp salt and ¼teasp ground black pepper
1 tablesp plain flour
500 ml (2 cups) red wine
250 ml (1 cup) beef stock (or chicken stock)
2 tablesp tomato puree
½ tsp thyme
1 bay leaf

16 small button onions or shallots peeled
60 gm (2 oz) butter
2 tablesp olive oil
375 gm (12 oz) button mushrooms

Put the flour with the salt and pepper into a large paper or plastic bag, and shake gently to mix. Drop in the beef cubes, a few at a time and shake to coat the meat with seasoned flour. Keep the bag firmly closed as you shake, you don’t want flour flying all over the kitchen and you!

If your casserole is safe to use on the stovetop, fry the bacon strips in it until the fat is rendered out and the pieces are crisp. Use a large frying pan if you can’t fry with the casserole. (The frying pan needs to be big enough to hold the meat, vegetables, stock and wine.) Take out the bacon, leaving the fat in the pan.

Add a big slurp of oil and heat until sizzling, throw in the meat cubes in batches so as not to crowd them, and brown all over. Set aside with the bacon. Now add the carrot and chopped onion and fry briefly.

Put the bacon and meat back into the casserole/frying pan, add the tomato puree, thyme, bay leaf and garlic, then pour in the red wine and stock. Bring the mixture to a rolling boil, stirring as it boils, and turn down to a low simmer. Allow it to simmer gently for five minutes to cook off all the alcohol, then transfer casserole to a preheated 160C (325F) oven. Cook for 3 to 4 hours.

Meanwhile, prepare the mushrooms and shallots. Heat up half the butter & olive oil in a small saucepan and sauté the onions or shallots for about 10 minutes until softened and brown. Set aside and repeat with rest of the butter and oil and the button mushrooms.

When the meat is tender, pour off as much of the liquid as you can from the casserole into a saucepan. Pop the cooked onions/shallots and mushrooms into the casserole, tucking them in around the meat. Bring the cooking juices to a boil, and simmer until reduced to about a third. Pour back into the casserole.

Serve with potatoes, either steamed or mashed and creamy, and steamed green vegetables.
Serves 4.

Another Beef Casserole in the next post!

Buon Appetito!

Tuesday, July 5, 2011

Pumpkins and Pears


It’s midwinter in Sydney – pale blue sky, sunshine, temperatures around 15-17C (60F), despite a chilly wind. Local councils are planning mid-winter festivities for the school holidays, with ice rinks in the parks or on the main streets. Meanwhile, up in the Blue Mountains they’re enjoying real winter – 100 kilometre/hour winds bringing trees crashing down on train lines, power outages, and sleet or even snow when the wind drops.

So, clearly it’s time for some winter comfort food! Keeping with our seasonal and affordable theme, I’m thinking pumpkin soup and a pear dessert. Pumpkins are one of nature’s wonder foods. They grow by themselves – a handful of seeds from a shop-bought pumpkin will transform into vines sprawling over your compost heap, backyard or balcony, and a minimum of two, and probably many more, pumpkins to last through winter and into spring.

No room for opportunistic pumpkins? No worries! At this time of year, all varieties of this giant squash – Queensland Blue, Jap, Butternuts and Golden Nuggets – are cheap as chips at the greengrocers. Butternuts are more expensive, perhaps for their thinner skin, but the other varieties keep better.

Golden Colour = Carotene

What are pumpkins good for, apart from cheapness and staying power? In a word, carotene. Pumpkins’ golden yellow-coloured flesh shows they are full of health-promoting carotenoids, including alpha and beta carotene, (precursor to vitamin A) – powerful antioxidants to combat free radicals that damage cell structure and DNA.

The really dark orange-fleshed pumpkins, such as butternut, also contain luteine, another form of carotene which is helpful in protecting the heart and for men, the prostate gland.

Pumpkin seeds, which many people like to eat roasted and salted, are high in protein, oil and B vitamins, and make a great garnish for vegetarian dishes. Don’t bother roasting the seeds of Queensland Blue – I found out the hard way they are virtually inedible, and even cockatoos disdain them!

Pears – Gift of the Gods


According to The World’s Healthiest Foods , pears were once known as “the gift of the gods”, but which gods is not explained. They are, however, a gift for people with food allergies, as pears are one of the few fruits no-one gets a bad reaction to, and can be eaten on a food elimination diet. Also, like their cousins, apples, they’re versatile, working well in sweet and savoury dishes.

Everyone knows pears are a good source of fibre, which plays a role in managing cholesterol levels, but they have other goodies as well. Despite their subtle flavour, they're a good source of Vitamin C, and also copper. Both help to protect against free radical damage and stimulate the immune system, vital in winter, with colds and flu around.

Beurre Bosc pears (sometimes pronounced Burey Bosk) are small brown pears that are best stewed or otherwise cooked. The bigger green ones are Packhams or Williams. They’re the cheap winter varieties. Green pears will ripen, even in winter, over a week or so in a fruit bowl, or in a paper bag if you’re in a hurry, and can be eaten fresh. You can buy lovely little red or gold coloured pear varietiess at famers’ markets, delicious to eat in a winter salad, if your budget stretches that far.

So, to the recipes

I would guess every Australian likes pumpkin soup, and most people know roughly how to make it. So here’s a variation I came across recently that neatly combines the two ps:

Pumpkin and Pear Soup

2 cups peeled pumpkin, cubed
2 cups peeled pears, cubed
1 leek, thoroughly washed and chopped roughly,
4 cups chicken stock or water
2 teasp grated fresh ginger (or 1 teasp ground ginger)
sea salt & white pepper to taste
¼ of a pear, peeled, cored & sliced thinly as a garnish (optional)

Put all the ingredients (except the garnish) in a large heavy-based pot, and simmer, covered, for 30 minutes, or until the pumpkin and pears are soft. Puree in blender or with a stick processor, and adjust the seasonings.

For the garnish, gently heat a couple of tablespoons of butter in a shallow pan and saute the pear slices until golden brown.
Serves 4

Pears with Cardamom Cream

This recipe heightens the somewhat bland taste of stewed pears with apple cider and lemon zest, and the subtle spiciness of the rich cardamom cream.

5 firm (not hard) pears, peeled, cored & sliced thinly
3 cups of apple cider (alcoholic or not, as preferred)*
zest of 2 lemons

Simmer gently until pears are soft but not mushy.
* Ginger beer could be used instead of cider.

5 egg yolks
2 cups milk (dairy or soy)
2 tablesp caster sugar
1 vanilla pod, split
3 cardamom pods, crushed.

Scrape the vanilla seeds into the milk, add the pod and cardamoms, and heat gently for five minutes to infuse the flavours. In a large bowl, beat together the egg yolks and sugar.

Add the warm milk gradually, whisking it into the eggs, then pour it back into the saucepan. Continue cooking over a low heat, stirring constantly, until the mixture thickens enough to coat the back of a spoon. Serve over the stewed pears
Serves 4

Buon Appetito!

Wednesday, June 1, 2011

Stocking Up for Winter

With the colder weather upon us, at least in the southern hemisphere, it’s time to think about simple warming foods like soups and stews that use fresh ingredients complemented by what you’ve got stashed in your pantry and freezer.

As well as a recipe for chicken stock, I’m going to tell you a way to preserve garlic, a tasty mushroom spread, and the easiest way to keep fresh ginger fresh

Making Stock

As discussed in my previous post, good home-made stock is a great basis for just about any type of soup, and can also add a depth of flavour to stews, casseroles and gravy. Making stock takes time, but it’s pretty easy, and the results, as well as being full of minerals and flavour, are much cheaper than the ready-made stuff. You need to allow time for the stock to cook, and time to drain it, so it’s a good idea to start the night before. You also need a deep enough stockpot to take up to six litres of liquid, plus all your meat and vegetables. It’s best if it’s a heavy based one, but I’ve managed for several years with a cheap stainless steel pot that always feels too light, but does the job.

It's possible to make beef stock, but that involves a LOT more time and some very big bones, so I very seldom make it. Chicken stock is a great all-rounder. It's also possible to make a vegetable stock, but it isn't worth the effort - it doesn't keep well, and it's easy enough to make fresh each time.

Basic Chicken Stock

2 kilos (5 lbs) of chicken necks (very little meat) or chicken drumsticks (lots of meat)
large handful of salt,
3 or 4 bay leaves
8-10 black peppercorns
Celery leaves
3 large onions, skin on, cut in half
4 carrots chopped in quarters
3 or 4 garlic cloves, peeled
1 tablesp white wine or vinegar (helps to dissolve the minerals in the bones)
5 litres of cold water.

Put all the ingredients in your stockpot, bring to the boil and allow to boil vigorously for 10 minutes, then turn down and simmer for an hour. If using the chicken drumsticks, now is the time to pull them out and strip of all the meat, then throw the bones back in and simmer for another 45 minutes. The chicken necks can just be simmered for the whole time. Keep an eye on the pot that you don’t lose too much liquid from evaporation.

When the simmering is done, turn off and allow to cool slightly while you put together your draining set up. You need a large colander, balanced over a pot big enough to take the approximately 3½ litres of stock. Pour the contents of the stockpot careful into the colander, scooping all the solids in as well. Cover and leave for a couple of hours, overnight is good, for every drop of goodness to drip through.

Throw all the solids into your compost bin, put the stock back on the stove and bring to the boil. Let it boil vigorously for at least five minutes to sterilise it, then pack it while hot into freezer containers. Any fat in the stock will rise to the surface and solidify in the freezer, and can be scraped off before you use your delicious and nutritious stock.

Hint: Keep a bread bag in the freezer and every time you prepare vegetables for a dish, put the trimmings in the bag. (Don’t use potatoes or potato peelings, they make the stock taste muddy.) Tops and tails of carrots, the outer skin of onions, the coarse ends of celery, and in particular celery leaves, are all good, and provide the basic aromatics for your stock. When you buy a bunch of celery, cut the leaves off immediately to stop the plant transpiring and losing its crispness. The leaves add valuable minerals – calcium, magnesium, potassium and sodium – as well as flavour to your stock.

Keeping garlic in the freezer

Recently my local greengrocer had an over-supply of garlic and was offering 5 heads for $1. That’s way more garlic than I usually buy, especially in this rainy weather, when I’ve had garlic – the natural antibiotic – go mouldy! But I reasoned it should be possible to freeze garlic, and after a bit of Googling, I found several suggestions. Here’s my favourite. It takes a bit of chopping, but you have instant garlic.

Chop the garlic cloves roughly and put in the blender or food processor with some oil – about 1/3 cup to a cup of chopped garlic. This is vague I know, but it’s a matter of how much oil you think is just right. You don’t want it too runny but not too dry, as the oil helps prevent the garlic drying out. Whizz the mixture until it looks chopped enough for you. Decant into small airtight containers, label and freeze.

The neat thing about this method is that the mixture doesn’t freeze completely solid. It’s easy to scoop out as little or as much as you want without thawing the garlic. If you’re the sort of person who uses lots of garlic butter, simply replace the oil with butter. I would increase the proportion of butter to garlic, probably to 1:1. It’s all a matter of taste. Either way, you get all garlic’s health benefits – the antioxidants and polyphenols – especially allicin – that protect the heart and circulatory system and lower LDL cholesterol. To say nothing of it’s magnificent flavour!

Savoury mushroom spread

The same greengrocer had an abundance of white mushrooms, also very cheap, so I bought about 1 kilo (2lbs). As mushrooms are very light, you can imagine what a large lot that was. What I had in mind was a similar trick to preserving the garlic – some way to freeze the shrooms so they would be delicious when defrosted. I found this recipe in an old paperback on preserving. It was intended for wild fungi picked in the early morning from a dew-laden field, but it worked just as well for my cheap urban shrooms.

4 cups chopped mushrooms
1 cup chopped onion
At least 1 clove garlic, chopped fine or minced
1 tablesp olive oil
1 teasp soy sauce
1 teasp dried savory or rosemary
1/2 teasp dried thyme or oregano
1/4 teasp nutmeg
1/8 teasp black pepper
a few grinds of coarse sea salt

Sauté the onion and garlic gently in the oil. When the onion starts to soften, add the mushrooms and cook over low heat for about 5 minutes. Add the remaining ingredients and simmer about 10 more minutes over low heat.

Decant the hot mixture into small air-tight containers, label and freeze. This is good on toast, as a sauce for steak, chops, sausages – anything that would be improved with a dollop of mushrooms. It goes well in an omelette, and is handy for boosting the flavour of soups and casseroles.

Freezer-fresh ginger
Keeping ginger in the freezer is ridiculously easy. Simply cut the ginger rhizome into chunks about the size you would normally use. Leave the skin on, and wrap each chunk in cling wrap, then drop the chunks into a ziplock bag, or a handy bread bag. You can peel and grate or chop your ginger chunk while it's still frozen. (Don't defrost it - it goes soggy and uncooperative.)